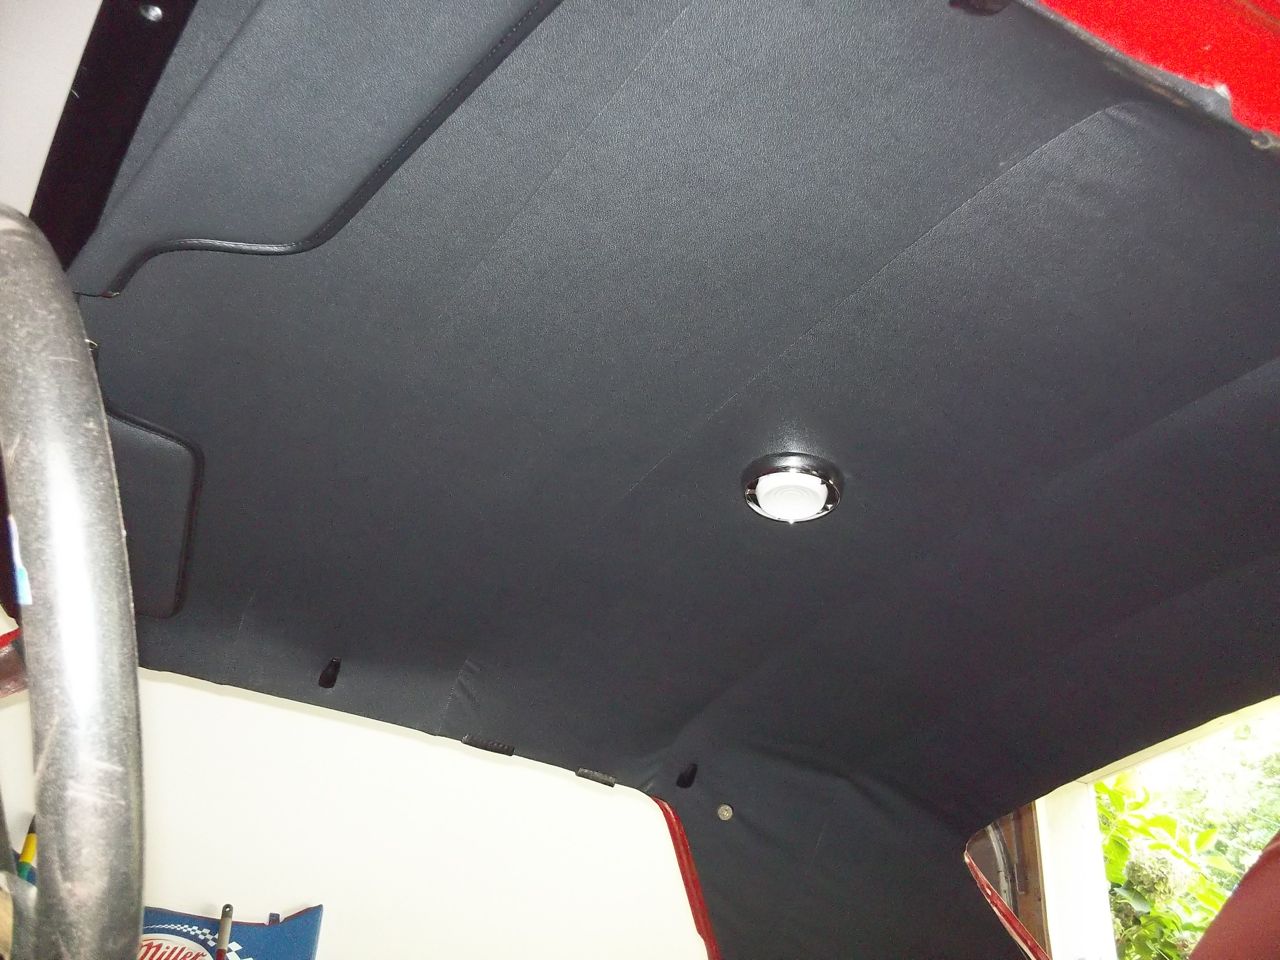
Installing A 1965-73 Mustang Headliner – this task should take about a day if you include removing and installing all necessary peripherals. It will require the help of an assistant to remove and install window glass! You will need a new headliner, headliner glue, a screwdriver, a knife to cut the old windshield gasket out, two tubes of windshield sealant, a putty knife, and x-acto knife or a razor and some clips. I usually also need a heat gun or hair dryer. a nice supply of strong clothes pins (the springy type) or some old windlace comes in handy to help make nice job,
In steps 15, 16 and 17, I use old pieces of windlace cut into 1 – 1 1/2 inch pieces to hold the headliner in place. I spray my contact type glue onto the headliner and metal frame where it will be glued and then when the headliner is stretched over the metal frame, I clamp a short piece of the windlace over it in that location. It adds strength to the location while I am working. I leave the clips on until I am 100% done. I can remove them as needed if I have to restretch the material. As a rule, I leave my clamps on overnight and reinstall the glass and interior pieces the next day. After I remove the clamps the next day, I trim all spare materials, and reinstall lights, hooks, sunvisors, etc.
The job can be done in one day, but I am getting older and find I do better work installing glass and such when not tired. A couple of young bucks and do the entire job in one day
-
Open up your headliner and lay it flat in some warm and clean place. This will soften the material and allow the box wrinkles to smooth out making it more workable.
-
Remove the rear seats, rear backrest, both rear quarter panels and the package tray.
-
On the 1965 and 1966 remove the two metal ends at the upper windshield post and on the 1967 and later remove the padded windshield post.
-
Remove both sun visors, rear view mirror bracket and the coat hangers on both sides and if necessary, the dome light.
-
Where items were held in with screws, replace the screws so the holes can be easily located later on.
-
For a factory type installation remove the front windshield and rear window. If you don’t remove the windows you will have to tuck the new headliner under the rubber molding lip and the job is much harder and likely to not be as good.
-
Remove the snap-on windlace and pull the headliner away from the sides
-
If you did not remove the windows, remove the headliner from the front and rear lip under the rubber
-
If you did remove the glass, peal back the headliner from the window openings.
-
Look at where the metal bows go into holes in the roof sides. There are multiple holes, it is important that you mark the holes that the bows are in, so they can be reinstalled into the same holes.
-
Starting at the front, move the headliner toward the rear of the car and remove the bows holding the headliner in place, the last bow is held in place by two wire clips you will need to unclip these and then take the headliner out.
-
The bows are different sizes so before removing the bows from the old headliner, number them from front to rear. On a flat surface, install the bows into the new headliner. It is easier if you alternately push the metal bow in from one side and push the material in from the other side.
-
Next, install the headliner in the car by inserting the rear bow in it’s correct dome hole, fasten the two clips to the bow. Continue installing the bows working your way forward until all the bows are in place.
-
Now you are ready to start gluing. Start by gluing the front lip at the windshield. Glue both surfaces and allow to dry completely. Pull the headliner forward in the center and glue right above the rear view mirror first. Pull both corners at the sun visors forward and glue in place. Be sure to pull the headliner nice and tight. The two wire clips in the rear will prevent it from coming too far forward. This step is more difficult if the glass is still in and requires the use a dull putty knife to tuck the headliner under the window molding’s lip. Take care not to cut or rip the headliner
-
After the front is in place, glue the opening around the rear window. Allow to dry and glue the entire rear window area in place. If the glass is still in, follow the instructions above and be careful.
-
Glue the 1/4 – inch lip above the door and quarter windows on both sides and allow to dry. Starting at the front, pull the headliner snuggly from side to side at the seams until the wrinkles come out.
When the headliner is completely glued in place, trim the excess material 1/2 inch away from the metal edge, glue the headliner and the lip and fold the headliner over the edge. In the rear corners where the headliner meets the package tray install the two cardboard strips and slit the headliner to allow the front half to catch the prongs in front of the package tray. -
Locate the screws for the sun visors, rear view mirror and coat hanger. Cut a tiny hole and remove screws. Replace the sun visors, rear view mirror and coat hangers.
-
On 1967 and later, cutout the dome light hole and replace the dome light.
-
On 1865 and 1966, install the two upper windshield post metal ends.
-
Replace the package tray, front and rear windows, rear quarters, rear seat and backrest and your headliner is complete.
-
If you have some wrinkles in the headliner, use a hair dryer and heat the area around the wrinkles–all or most will disappear when cool.
NOTE: IFYOUR REMOVED YOUR GLASS, AND WANT TIPS ON HOW TO EASILY INSTALL IT SO IT DOESNT LEAK, GO TO TIPS IN THE BODY SECTION AND LOOK UNDER WINDSHIELD INSTALLATION!


